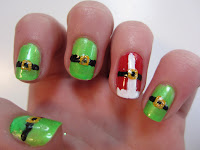
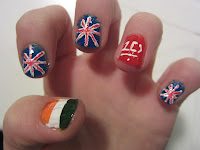
Color blocking is a very popular trend right now and it will remain a trend throughout the fall. I wanted to do this as a manicure on my amazing friend Emmy! Remember her?! Emmy's nails looked so gorgeous once the manicure was finished! I adore it! Since it's still summer, I used bright, bold, summery colors!
This Fall's colors are more neutral and a little darker. To color block, you need to know your contrasting colors and what colors compliment each other. To make a color blocking outfit is simple, one possible way is to have a a plain shirt and bottoms. Than for you accessories, pick one color and then apply! The accessories will bring the outfit together! Mix and match the colors you choose! Don't be afraid, go wild! Color blocking is mainly mix and matching. Where a rich blue top and red pants! Maybe even add a red belt to your top! Do you understand the concept of color blocking?
For this color blocking manicure, I used a green, China Glaze: I'm with the Lifeguard, a hot pink, O.P.I.: Cha-Ching Cherry, and an orange, Wet and Wild: Sunny-Side Up. The nail art I used is a sparkly blue from L.A. Colors.
First, use your base coat. Then, take the color you want to be at the top of the nail (the top is the cuticle in this case) and apply. Personally, I think the more nail polish you apply, the easier it is for it to chip of peel. If your color is rich, only apply one coat, if your color isn't very strong apply two coats. I had to do this for the green.
Now choose your second color, which will be in the center. My color is the hot pink. you are going to place your brush 3 quarters of the way up. the summit of the pink should be facing outwards, in other words, make the highest point face the pinky. Then make a slanted line downwards until you reach the other side in the center. The line doesn't have to be completely clean. Mine came out a lot better than I thought they would. If you let your lines get to sloppy, the nail art won't work. Paint the rest of the nail leaving some green at the top. All your nails should look like this:
Take your third color. Place the brush at the lower end of your second color. Make a downwards slant again, but this slant will end at the tip of the nail, either at the corner or near it.
Remember, your line does not have to be perfect! Your don't want to see your first color at the bottom the nail. If you still see your first color, cover it u with your third color. After you finish these steps, your nails will look like this:
Pretty! Finally the nail art! My nail art is blue because it pops on the other colors. You want to put the nail art where each of the colors meet. The nail art must be straight, otherwise your nails will look sloppy. each of your nails should look similar to this one nail:
Remember to add your top coat to make your nails look glamorous! The best time to add top coat is when your nails are nearly dry. This is to prevent your amazingly hard work from smudging! Use nail polish remover to clean up any messes you made on your fingers. All your nails should look like this in the end:
This is color blocking! Isn't it fabulous? These colors are perfect for summer, but Fall is not bright and neony! Use rich colors for fall!
Tomorrow is the first day of August! We are more than half way through the summer! It's getting near the school year :( I would like to share some really fashionable tips on how to make your binders, notebooks and other school supplies look awesome! I know I'm gonna enjoy the rest of my summer to the fullest! Until the next time,
Be bold, bright, and gorgeous!
Gabby


